© Jean M Dean
PROCESSING A DATA SET WITH NEBULOSITY Print
Processing images is quite straightforward and this paper walks you through the basic process using Stark Labs Nebulosity 4 software. The software comes with an excellent manual that is easy to read and full of information on frame calibration, stacking and post-processing. This walkthrough is a typical approach for a DSLR data set. To start with you can accept most of the software default values as they work well, when you are familiar with the basics then you should start to experiment with other available options within the software.
The opening screen has controls for Display stretching of the image and typically, you should check the Display Auto box so that you will see a realistic image. However, you can stretch the screen histogram if you want using the B and W sliders. To reset it at any point just click Auto. Whatever you do here will not affect the actual image file. The Zoom functions are simple +/- buttons. The camera control is for image acquisition only so you will not need these functions. The Abort button though, will terminate any processing commands. The information bar at the bottom will tell you what the software is doing. Sometimes you might think Nebulosity is not working but if you look in the information bar you will see that it is processing data.

The starting point is a set of camera raw Light, Dark, Bias and Flat frames. Before any processing open your raw Light frames and grade them. Remove any that have a lot of star trailing or other artifacts so they do not affect the overall finished image. Any you do not want to use add a Rename prefix. If you select Delete the file will be deleted from your computer for good, it will not be in the trash bin, so beware! To see the raw, unprocessed image you will have to uncheck the Display Auto box and adjust the sliders. The image will be black and white.

For this walkthrough I am using images of the Orion Nebula taken on a Canon 600D and a William Optics 66mm diameter Zenithstar refractor on a Skywatcher EQ6 mount. After grading I am using:
15 Light frames at ISO800 at 180 second exposure
15 Dark frames at ISO800 at 180 second exposure
10 Flat frames (aurora panel) ISO800 at ¼ second exposure
30 Bias frames at ISO800 at 1/4000th second
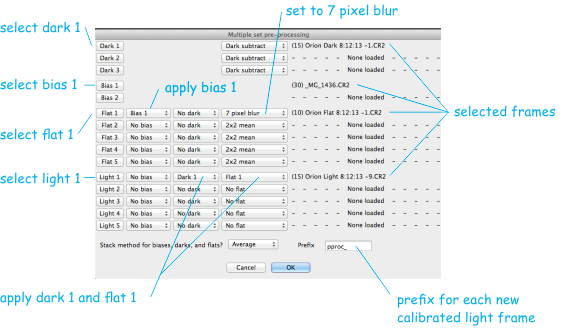
The processing sequence begins with pre-processing the Dark frames, Bias frames and Flat frames. Afterwards they need applying to the Light frames (calibration). All this is done in one step.
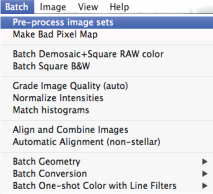
ALL THE PRE-PROCESSING COMMANDS ARE UNDER THE BATCH MENU
Select files as shown below and press OK. A new set of Light Frames will be written with the prefix pproc_. This completes the pre-processing stage.
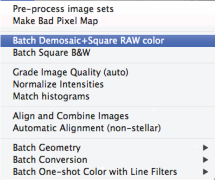
Next the calibrated Light frames need to be debayered (de-mosaiced) and converted into colour images with square pixels using the Batch Demosaic + Square RAW colour command. Remember to select the pproc_ light frames.
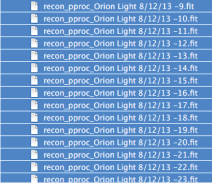
After this each light frame will have the additional prefix recon_.
 Once the debayering is done the colour images should be aligned and stacked into a single image to increase the signal to noise ratio using Align and Combine Images.
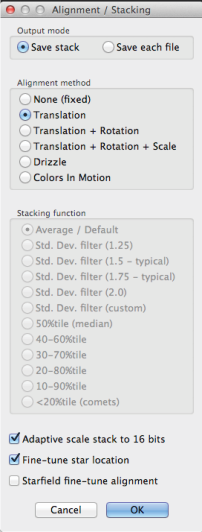
Keep the default Output mode of Save Stack. Select Translation if the frames have only moved slightly in x and y. If there has been any rotation select Translation + Rotation. Rotation may occur if you have moved your framing slightly, such as imaging over a few nights. Select OK.
For Translation you will be asked to select the same star in each of your Light frames. Pick one that is a medium brightness. For Translation + Rotation you will be asked as before to pick the same star in all the Light frames then you will be asked to do the same again for a second star.
When stacking is complete you will be asked to save the file, which will be in a .fit format.
Do not worry if your final image does not look very good at this stage that is normal. At the moment each pixel value is a simple linear representation of what the photosites on the sensor have recorded. While the data is LINEAR we have to adjust the background and colour balance. This is done in one step, but to get an accurate colour balance we must first crop away any edge artifacts.
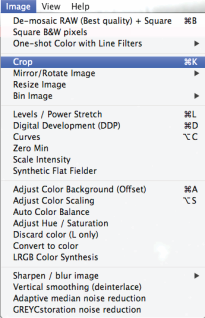
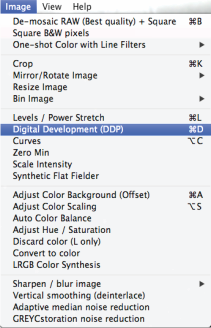
THE COMMANDS FOR THIS WILL ALL BE UNDER THE IMAGE MENU
First you need to crop the image slightly to remove any black border that has resulted from stacking as this can affect the background neutralisation and colour balance. Make sure the Display brightness Auto box is ticked (top right of Nebulosity window). This will set a good starting point. Then uncheck the box and adjust the sliders in small increments until you see a good image on the screen. This function only alters the screen view and not the actual image file.
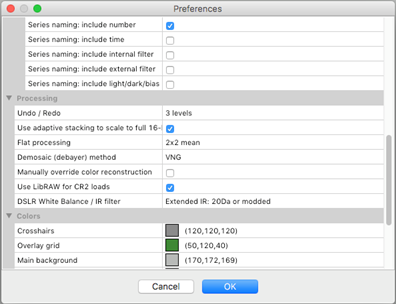
Use the cursor to pick a point at the top left and holding the mouse button down drag the rectangle towards the bottom right. A box will appear. Select Image > Crop. The default main background colour is black so it can sometimes be difficult to see the edge of the image, you can change this in Nebulosity > Preferences, and Colors > Main Background.

Now the colour balance of the target and stars needs to be adjusted, as a DSLR does not have the right colour balance for astrophotography. To do this select Image > Auto Color Balance. Most of the time the auto function will work very well.
If you do not like the auto colour balance result then you can undo this (Edit > Undo) and adjust it manually. Adjust the background first (Image>Adjust Colour Background) and then adjust the target colour balance (Image > Adjust Color Scaling) using the sliders.
Up to this point all processing has been done on LINEAR DATA. Now it is time to do some NON-LINEAR stretching. Reset the Display brightness by checking the Auto box so you can see the effect of the next step that will now alter the actual image file. From this point on the Display controls should not be used.
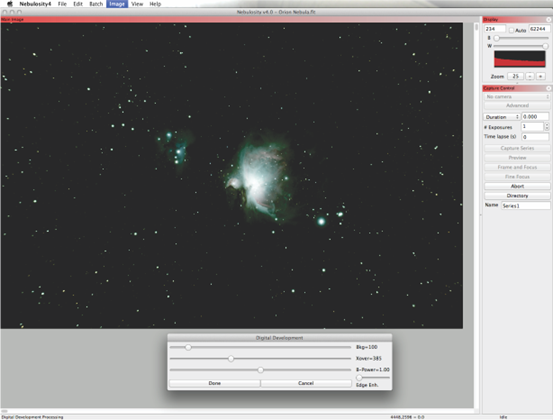
Select Image > Digital Development Processing (DDP) algorithm. This takes the linear response of the sensor data and converts it to a more film like response bringing out the faint areas without over brightening the highlights.
The first slider (Bkg) sets a level for the background; the second slider (Xover) sets the cross-over point where the transformation shifts from a linear to a curved one; the third slider (B-power) provides a method for darkening the background during the DDP process; and the fourth slider (Edge Enhancement) controls the amount of sharpening done.
Now you will start to see some nice detail in your image. Take note of the default values on the three sliders and move each one left and right one at a time to see the effect. Play around with the three main sliders to get a good image. It does not have to be perfect, if there is a slight colour cast do not worry this can be removed later. Use any edge sharpening with caution as it can result in halos around the stars.
If you look back at the screen shot on page 2, this was a simple linear stretch. You can see it has been applied to all the pixels in the image equally, over exposing the bright core. The DDP algorithm however, does not affect the bright areas; it stretches the dimmer regions only.
This is the main part of the processing done, converting several calibrated Light frames into a single image which now has a total integrated exposure time of 45 minutes and considerably less noise than a single image of 180 seconds. You can at this stage, transfer your image into software such as Photoshop or finish processing it in Nebulosity. For transferring to Photoshop save as File>Save 16- bit/colour TIFF.
In Nebulosity add some final touches to your image by using the other tools under the Image Menu. There are curve tools for additional non-linear stretching, you can use the presets such as Keller Stretch or do it manually. You can also make minor adjustments to the colour balance, saturation and hue.
A note of caution, with any final tweaking of the image it is better to do several small changes rather than a single large one.
When you get more familiar with the software try experimenting with other Batch and Imaging options. Remember to read the manual as it gives very good descriptions and explanations of the functions.
Finally, it is best to save your images as you process them. For example, after I have saved the basic stack, I will save it again after the DDP (e.g. Orion Nebula DDP). This way if I do not like a final result I can go back to a previous point.
For Nebulosity software see: http://www.stark-labs.com/nebulosity.html
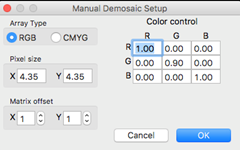
Nebulosity debayering information
Go to Nebulosity>Preferences>Processing>DSLR White balance/IR
For a modified DSLR (eg Canon 60DA) select Extended IR
For all other cameras select Stock 5D
All Canon DSLR’s will debayer automatically.
For Nikon D7000 (4.78μm) and D850 (4.35μm) cameras here are the settings: